Shower Installation Guide: From Layout to Finishings
December 18, 2025
A well-designed shower is more than a functional space—it’s a personal sanctuary that blends aesthetics, comfort, and efficiency. Proper shower installation requires careful planning and attention to detail, as even minor missteps can lead to costly repairs or compromised usability. Homeowners and professionals alike need a comprehensive understanding of the steps involved in installing a shower, from conceptual layout to final finishings. This guide aims to demystify the process, offering practical insights for achieving a shower that is both visually appealing and long-lasting.
Whether renovating a bathroom or designing a new one from scratch, selecting the right materials, planning the layout, and understanding the mechanics of water flow are critical to a successful installation. This blog provides a step-by-step roadmap for homeowners, DIY enthusiasts, and professionals seeking reliable information on shower installation. From structural considerations and waterproofing to tile selection and finishing touches, each section equips readers with actionable knowledge to navigate the complexities of this essential bathroom feature with confidence and precision.
Planning and Layout
Assessing Space and Functionality
Before any installation begins, evaluating the available space is essential. Measure the dimensions of your bathroom carefully and consider the shower’s position in relation to other fixtures, such as sinks, toilets, and cabinetry. A well-planned layout maximizes usability while maintaining aesthetic harmony. For example, corner showers can save floor space in compact bathrooms, while walk-in showers provide an open, modern look in larger spaces.
Additionally, think about accessibility and comfort. Standard shower dimensions range from 32” x 32” for small units to 36” x 60” or larger for walk-in designs. Ensure enough space for movement, storage, and future maintenance needs. Including built-in niches for toiletries or benches for seating can enhance functionality without compromising design.
Considering Plumbing and Water Flow
Proper planning also requires understanding your existing plumbing infrastructure. The location of water supply lines and drains influences where your shower can be positioned. Ideally, you should align the shower base with existing plumbing to minimize costly rerouting. Assess water pressure to ensure a consistent and comfortable showering experience. High-efficiency fixtures may require specific pressure ranges, so consult product specifications during the planning stage.
Selecting Materials and Fixtures
Choosing the Right Shower Base
Shower bases come in various materials, including acrylic, fiberglass, stone, and tile. Acrylic and fiberglass are lightweight, cost-effective, and easy to install, making them ideal for DIY projects or budget-conscious renovations. Stone and tile bases, while more durable and visually striking, require professional installation and additional waterproofing measures. Consider durability, maintenance requirements, and aesthetic goals when selecting your shower base.
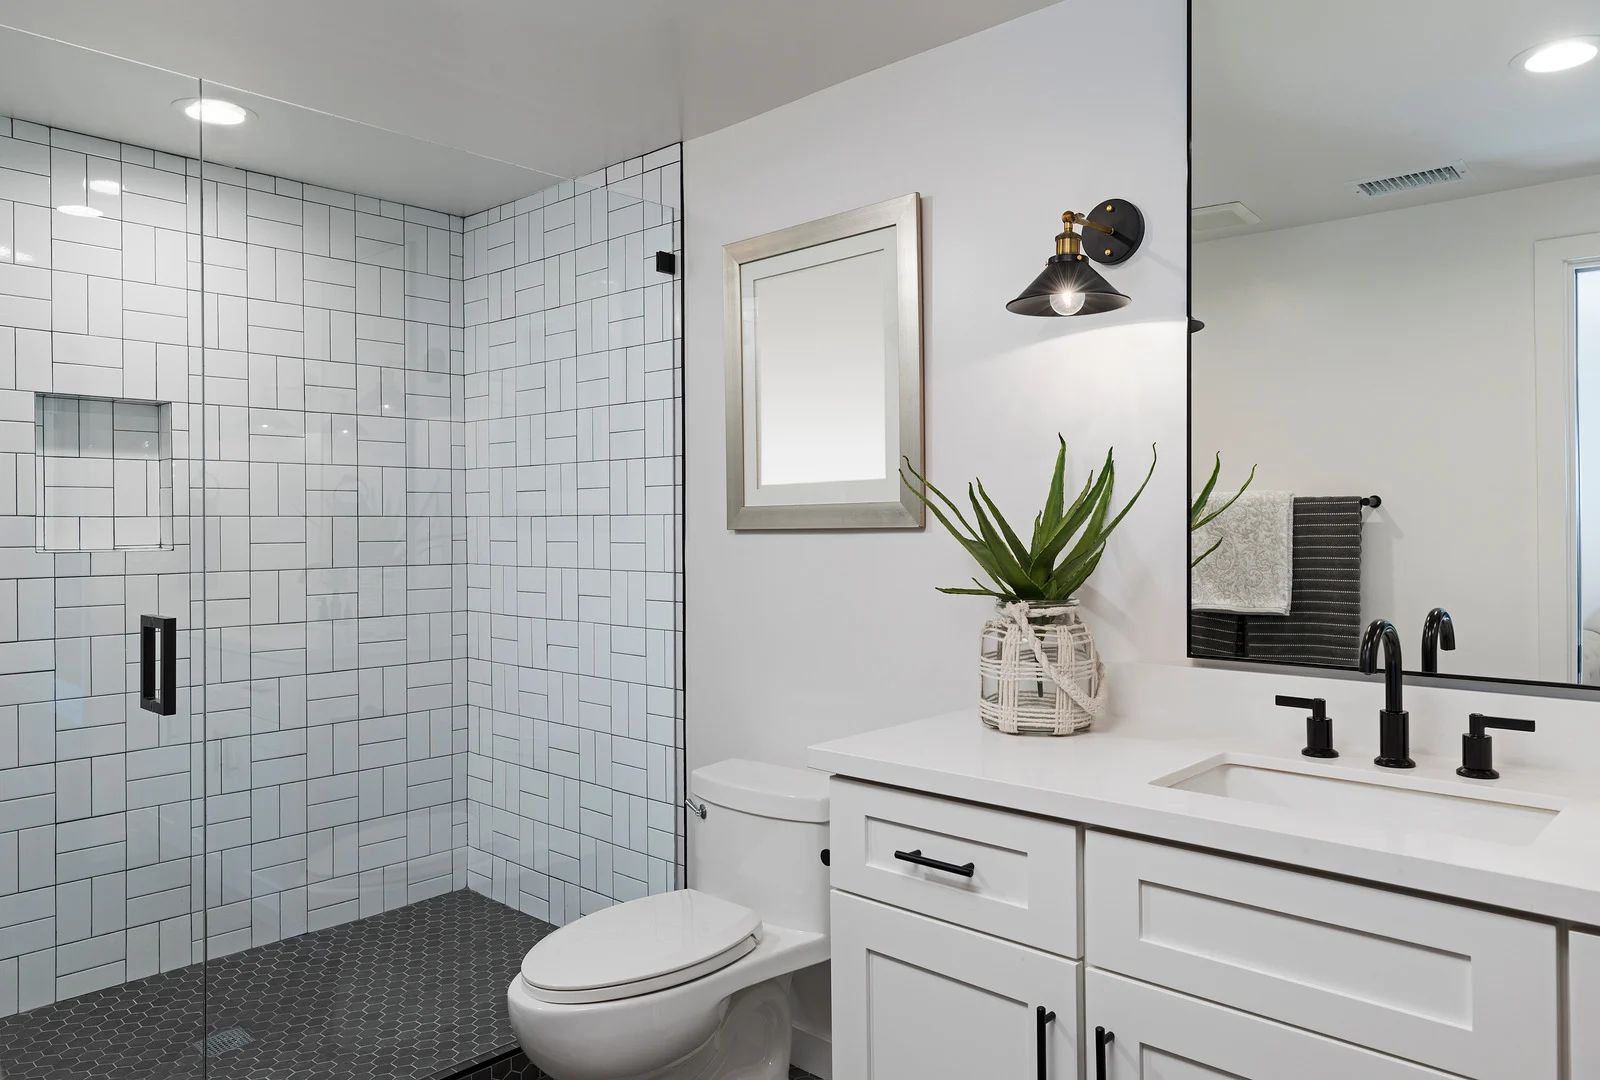
Selecting Wall Panels and Tiles
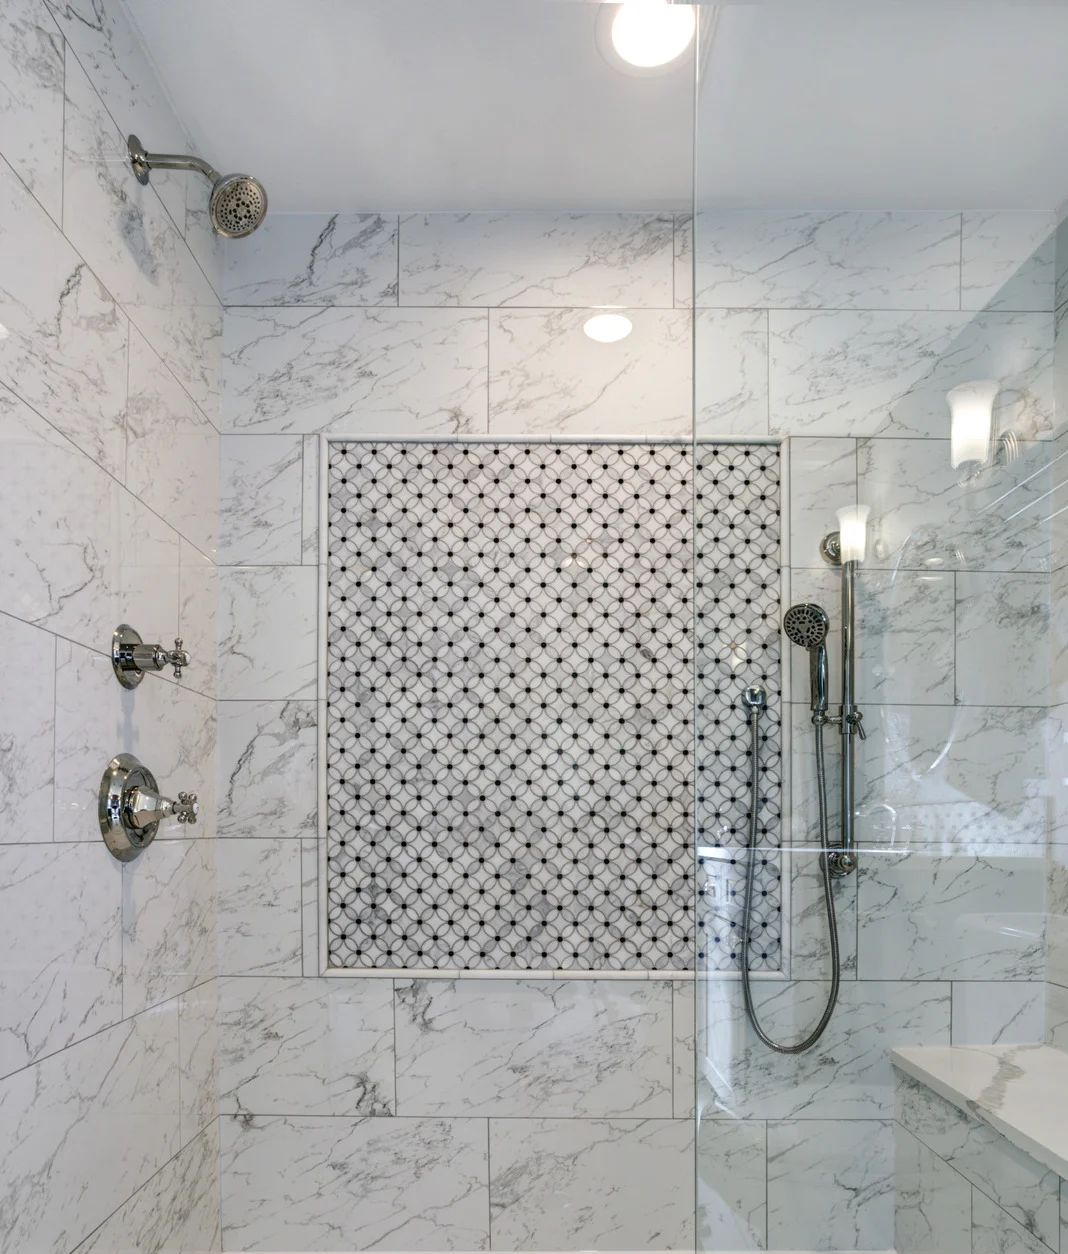
Wall panels and tiles not only define the shower’s appearance but also protect surrounding areas from water damage. Ceramic and porcelain tiles are popular for their durability and variety of finishes. For a seamless look, solid-surface panels are easy to clean and require fewer grout lines. When choosing tile, think about texture to prevent slips—matte or textured finishes improve safety compared to glossy surfaces.
Shower Fixtures and Accessories
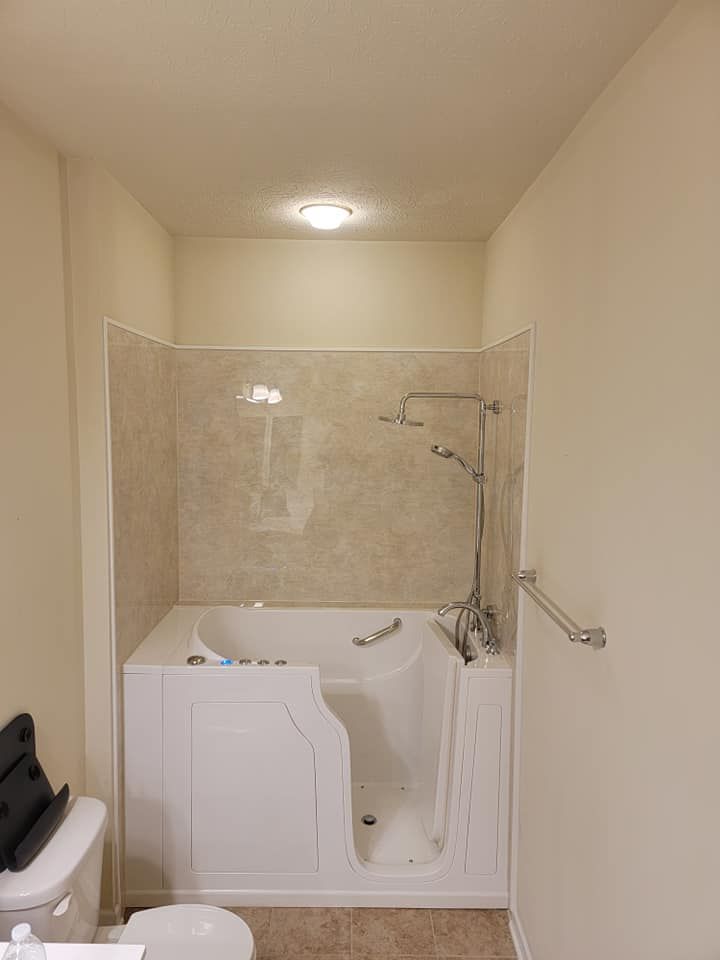
The choice of fixtures affects both functionality and style. Consider showerheads, hand showers, faucets, and thermostatic controls. Rainfall showerheads create a luxurious experience, while handheld options provide versatility for cleaning and accessibility. Don’t overlook water efficiency; modern low-flow fixtures reduce consumption without compromising comfort. Accessories like soap niches, grab bars, and towel hooks enhance convenience and usability.
Structural Preparation and Waterproofing
Ensuring a Solid Foundation
Before installing any base or wall panels, ensure the floor and walls are structurally sound. Repair cracks, level uneven surfaces, and reinforce subfloors if necessary. A strong foundation prevents long-term problems like tile cracking, water pooling, or shifting of the shower base.
Waterproofing Techniques
Waterproofing is arguably the most critical step in shower installation. Moisture intrusion can lead to mold, mildew, and structural damage. Common methods include applying a waterproof membrane under tile or using pre-fabricated shower pans with integrated waterproofing. Ensure all seams, corners, and wall joints are sealed with appropriate materials. Consider additional protection such as waterproof backer boards behind tiles and moisture-resistant paint on surrounding walls.
Drainage and Slope Considerations
Proper slope ensures water flows toward the drain, preventing pooling and seepage. Standard recommendations suggest a 1/4 inch slope per foot toward the drain. Pay attention to both the shower base and floor tiles to maintain consistent drainage. Even minor deviations can lead to standing water and long-term damage.
Installation Process
Installing the Shower Base or Pan
Begin with positioning and securing the shower base. For pre-fabricated pans, follow manufacturer guidelines to ensure level placement and secure attachment to the subfloor. For custom tile bases, install a mortar bed to achieve the correct slope, then set the tiles in place. Check for level and slope consistency before the mortar sets.
Wall Panel and Tile Installation
Install backer boards on walls, ensuring tight seams and secure attachment. For tile installations, use a high-quality adhesive and apply tiles with consistent spacing. A level and straight layout not only improves aesthetics but also prevents water from seeping through uneven gaps. Consider waterproof grout and sealants to maintain integrity.
Fixture Installation
Once the base and walls are complete, install plumbing fixtures. Connect showerheads, faucets, and drains according to manufacturer instructions. Test for leaks and proper water flow before proceeding with finishing touches. Ensure that all connections are secure and compatible with existing plumbing.
Finishing Touches
Grouting and Sealing
After tiles are installed, apply grout to fill the joints. Use a waterproof grout to prevent moisture penetration, and seal all grout lines for long-term protection. Allow sufficient curing time to ensure durability and reduce the risk of cracks.
Adding Functional and Decorative Elements
Shower installation is not complete without considering practical and aesthetic enhancements. Install glass doors, shelves, or benches according to your design plan. These elements improve usability and add visual appeal. Consider anti-slip mats or textured tiles for added safety. Choose fixtures and accessories that complement the overall bathroom style for a cohesive look.
Final Inspections and Maintenance Tips
Conduct a thorough inspection to verify that all components are functioning correctly. Check for leaks, proper water flow, and secure attachment of fixtures. Routine maintenance such as cleaning grout, inspecting seals, and ensuring drains remain clear prolongs the life of the shower. Regular attention prevents minor issues from escalating into costly repairs.
Common Challenges and Expert Advice
Handling Tight Spaces
Bathrooms with limited space pose unique challenges for shower installation. Opting for corner units, sliding doors, or custom-sized bases can maximize available space. Consult professionals for precise measurements and innovative solutions that enhance functionality without compromising comfort.
Dealing with Plumbing Limitations
Older homes or complex plumbing layouts may require rerouting pipes or upgrading water lines. Evaluate water pressure and consider installing pressure-balancing valves to prevent sudden temperature fluctuations. Engage licensed plumbers for modifications that ensure safety and compliance with local codes.
Achieving a Balance Between Style and Functionality
While aesthetics are important, functionality should never be compromised. Choose materials that are durable, easy to clean, and slip-resistant. Select fixtures that provide comfort and convenience while aligning with your design vision. Striking this balance ensures a shower that is both visually appealing and practical for everyday use.
Expert Best Practices
Experts recommend pre-planning every aspect of the installation, from measuring and material selection to waterproofing and finishing touches. Investing in high-quality materials, following manufacturer instructions, and adhering to local building codes ensures a long-lasting, reliable shower. Documenting the installation process can also assist with future maintenance or upgrades.
Enhancing Shower Durability and Efficiency
Routine Maintenance Tips
Regular cleaning and inspection prevent buildup of soap scum, mold, and mildew. Check grout lines for cracks, reseal tiles as needed, and ensure drains remain clear to avoid clogs. Small maintenance steps significantly extend the life of your shower.
Energy and Water Efficiency
Incorporate low-flow showerheads and thermostatic valves to reduce water and energy consumption. Efficient fixtures maintain comfort while minimizing utility costs. Consider smart shower systems for precise control over temperature and water usage.
Material Longevity Considerations
Selecting durable tiles, corrosion-resistant fixtures, and high-quality sealants ensures long-term performance. Avoid materials prone to cracking or discoloration, especially in high-humidity areas. Stone, porcelain, and quality composites are excellent choices for long-lasting results.
Upgrading Existing Showers
For older showers, retrofitting modern components such as handheld showerheads, anti-slip tiles, or updated faucets can enhance functionality and aesthetics without a complete overhaul. Professional guidance ensures compatibility with existing plumbing and surfaces.
Achieving Optimal Water Flow and Tile Longevity
Installing a shower requires careful planning, precise execution, and attention to detail. From initial layout considerations and plumbing evaluation to material selection, waterproofing, and finishing touches, each stage plays a critical role in creating a functional, durable, and aesthetically pleasing shower. By understanding the installation process, homeowners and professionals can avoid common pitfalls, achieve optimal water flow, and ensure the longevity of the shower system.
River City Bath, located in South Park Township, Pennsylvania, brings over 22 years of experience in bathroom remodeling and shower installations. Specializing in custom layouts, expert plumbing integration, high-quality material selection, and precision finishing, we have earned a reputation for reliability and excellence. Whether updating a small bathroom or designing a luxurious master suite, the team delivers tailored solutions with meticulous attention to detail. Their commitment to quality craftsmanship and customer satisfaction ensures every shower installation not only meets but exceeds expectations, transforming everyday spaces into functional and elegant retreats.